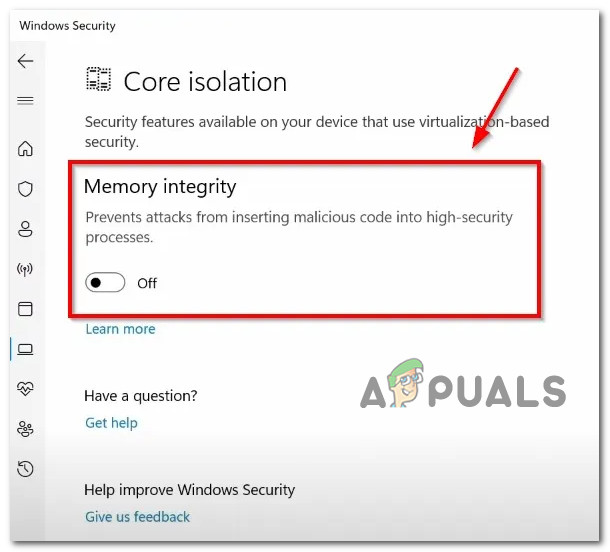
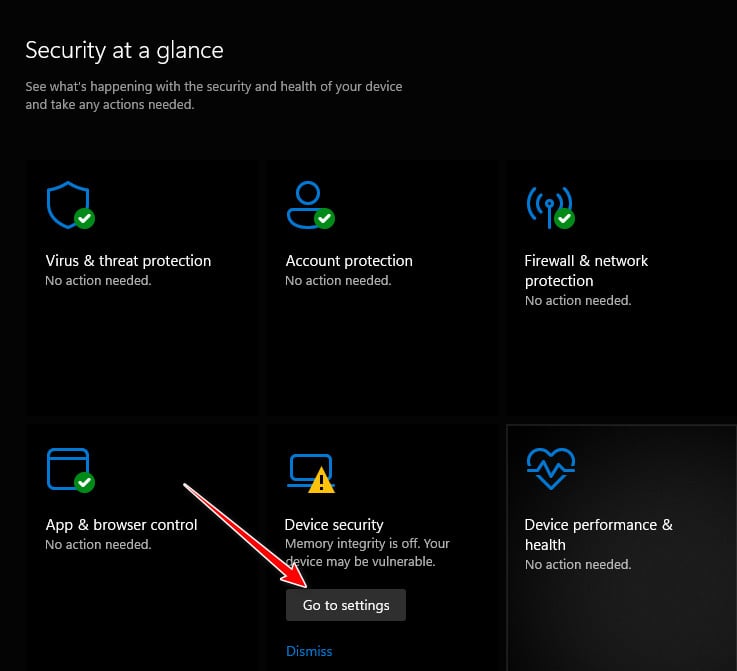
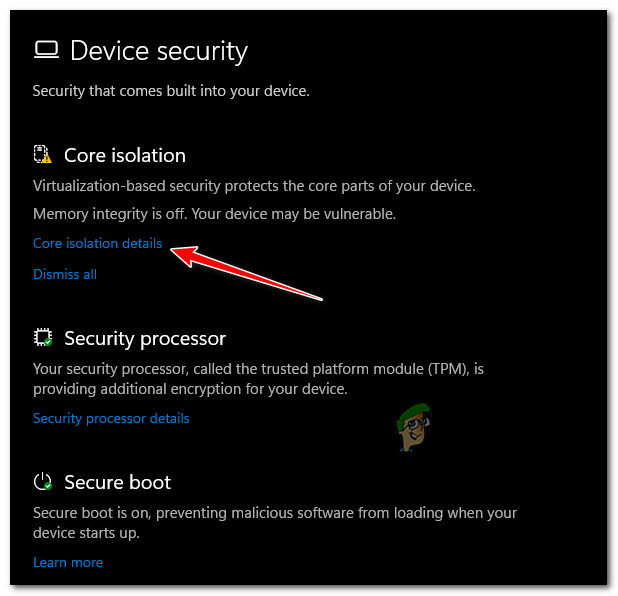
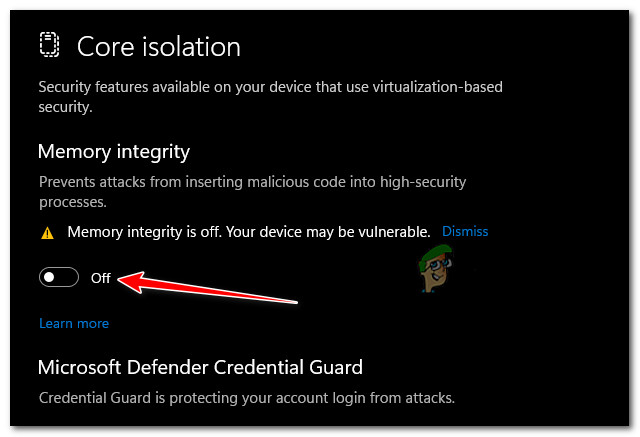
To combat this, Microsoft has released a tool that lets you turn on Core Isolation and Memory Integrity to stop these kinds of attacks in order to mitigate them. Note: Core isolation isolates the core programs in memory to shield them from malicious applications. It accomplishes this by performing those fundamental operations in a virtualized setting. Memory integrity, sometimes referred to as Hypervisor-protected Code Integrity (HVCI), is a Windows security feature that makes it more difficult for malicious software to take control of your machine via low-level drivers. It is intended to stop malicious code from being inserted into high-security processes during assaults. This function is available in Windows Defender Security Center. Device Security provides administration of the security features inherent in your devices, including the ability to turn features on to give heightened protection.
1. Meeting the Requirements
There are some requirements for this security feature. The hardware must also support it; it cannot only operate at the software level. Your firmware needs to handle virtualization, enabling the Windows 11/10 PC to execute apps in a container without granting them access to other system components. Also, your device must comply with the standards for hardware security, including:
UEFI MAT (Unified Extensible Firmware Interface Memory Memory Attributes Table)Secure Boot needs to be enabled.DEP (Data Execution Prevention) TPM 2.0 needs to be enabled. CPU Virtualization needs to be enabled.
UEFI MAT and DEP should be supported if you have a reasonably new system configuration (less than 7 years old). However, before we explore the options available to you that will allow you to enable core isolation & memory integrity on your Windows 11 computer, you need to ensure that CPU Virtualization, TPM 2.0, and Secure Boot are enabled.
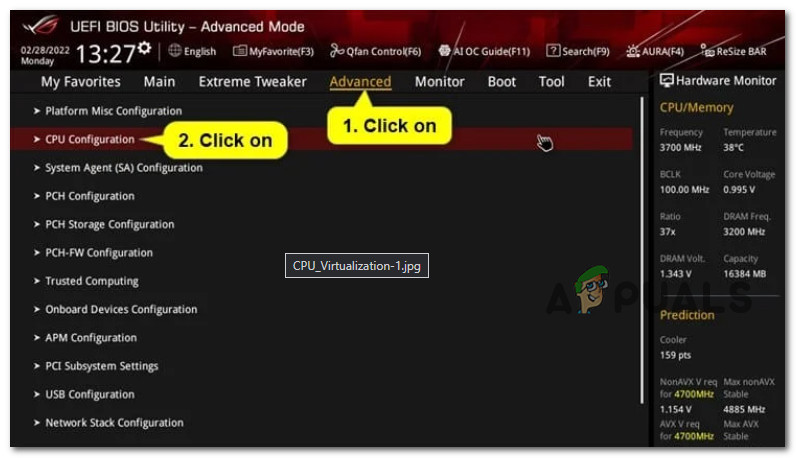
1.1. Enable CPU Virtualization
All modern AMD and Intel CPUs have a hardware feature called CPU virtualization that enables a single processor to behave as if it were several separate CPUs. This makes it possible for Windows to use the computer’s CPU power more effectively and efficiently, resulting in speedier performance. Note: This functionality is also necessary for many virtual machine programs (like as “Hyper-V”) and must be enabled for them to function correctly or even at all. Your computer is also able to imitate a different operating system, such as Linux or Android, thanks to CPU virtualization. You have access to a greater selection of programs to use and install on your PC when virtualization is enabled. In our particular case, CPU isolation is needed to facilitate the smooth running of the core isolation memory integrity feature on Windows 11. Follow the instructions below for specific instructions on how to enable CPU virtualization on your system:
1.2. Enable Secure Boot
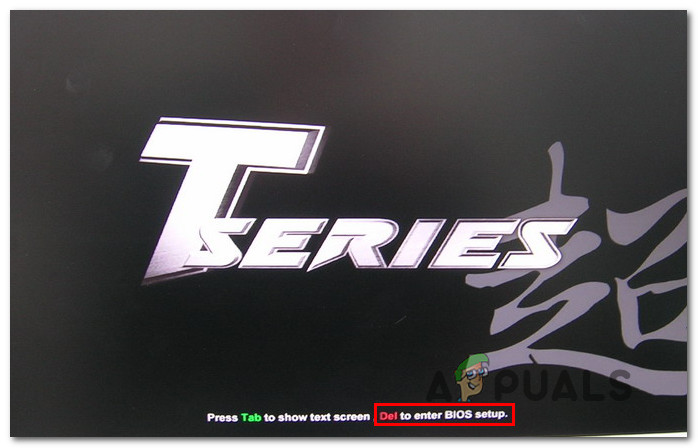
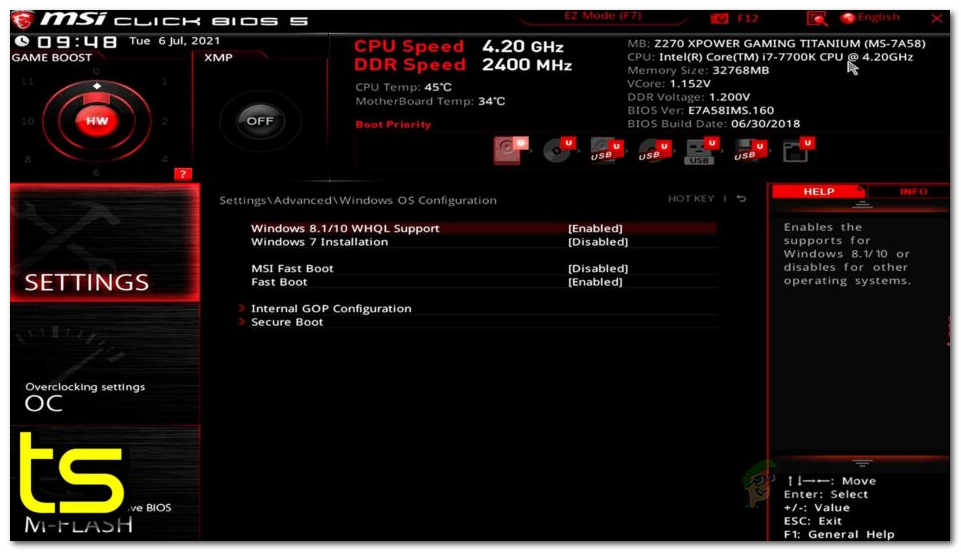
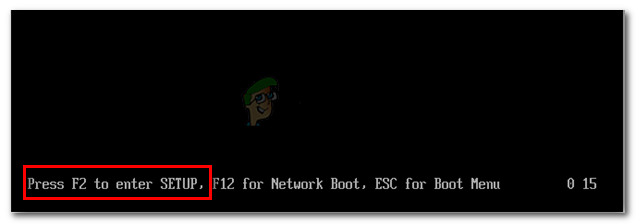
Memory core isolation will need a computer that is Secure Boot capable, as we have demonstrated above. However, there are times when a function is supported but disabled by the BIOS or UEFI settings. In these circumstances, tools like the PC Health Check might be unable to distinguish between supported and disabled features. To ensure that computers ONLY run software approved by Original Equipment Manufacturers, the largest companies in the PC industry have agreed to an industry standard called Secure Boot (OEMs). There is a very good probability that Secure Boot is already supported on your motherboard if it is one that is relatively recent. All you need to do in this situation is open your BIOS settings. Here’s what you need to do to enable secure boot on your Windows 11 computer:
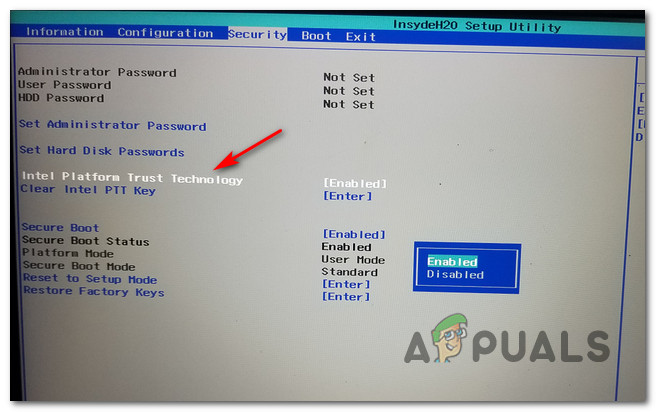
1.3. Enable Trusted Platform Module 2.0
Support for TPM 2.0 is one of the unique requirements for Memory core separation in Windows 11. In your case, one of the following situations applies if TPM 2.0 is disabled:
TPM (Trusted Platform Module) Your hardware does not support 2.0.The BIOS or UEFI settings on your computer have TPM 2.0 disabled.
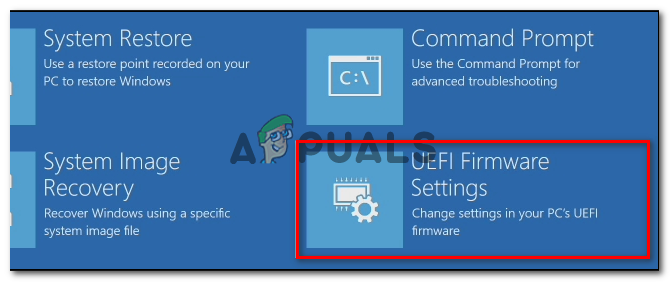
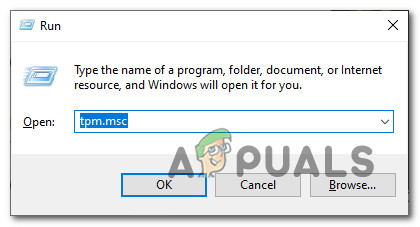
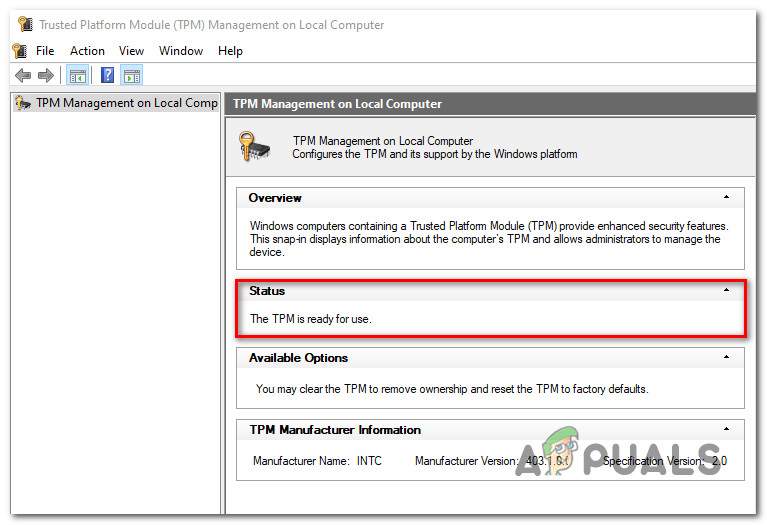
Do the following to see whether TPM is supported by your system and whether it is turned on or off: In case the message reads as ‘Compatible TPM cannot be found‘, follow the instructions below to enable TPM 2.0 in your BIOS or UEFI settings:
2. Enable Core isolation & Memory Integrity on Windows 11
Now that all the requirements are met, it’s time to explore all the available methods that will allow you to enable core isolation & memory integrity on Windows 11. Important: To activate or deactivate core isolation memory integrity, you must be logged in as an administrator. Also, CPU virtualization must be enabled for core isolation memory integrity. When it comes to enabling core isolation & memory integrity on Windows 11, there are actually two different ways that will allow you to do this: Both methods will allow you to achieve the same thing, but the way to get there is different. If you prefer using the Windows 11 GUI, go for the first option. On the other hand, if you are comfortable with using the Registry Editor, go for the second option.
2.1. Enable Core Isolation Memory Integrity via Windows Security
In Windows 11, this method is arguably the simplest method for turning on or off virtualization-based security. To put it another way, you must activate Core isolation. In order to do this, you need to access the Device Security menu (located under Windows Security) and enable the memory integrity feature from the dedicated Core isolation details option. Note: Our recommendation is to take the time and install any pending Windows update (cumulative, feature update and security updates) before following the instructions below. Here’s what actions you need to perform to get this done:
2.1. Enable Core Isolation Memory Integrity via Registry Editor
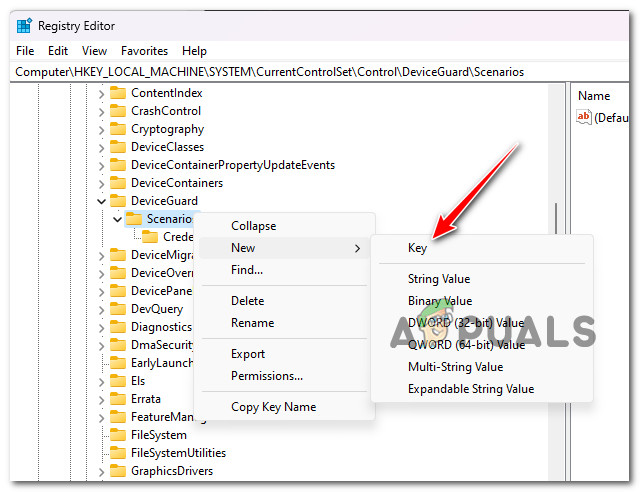
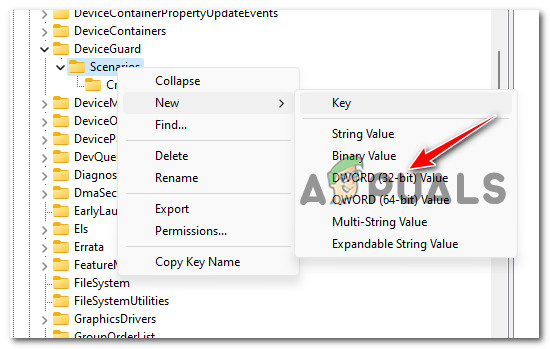
If you are comfortable with using Registry Editor to get things done, you also have the option to enable core isolation memory integrity by modifying your Windows 11 registry. Note 2: The similar error could appear if you attempt to install a device with an incompatible driver after turning on memory integrity. If so, the same advice still holds true: either wait until a suitable driver is released, or check with the device manufacturer to see if they have an updated driver you can download. This method involves creating a new registry value named HypervisorEnforcedCodeIntegrity under scenarios and setting the value data to before restarting your PC. Note: Our recommendation is to take the time to back up your Registry data in advance before following the instructions below. This will allow you to quickly revert these changes in case something goes wrong during this procedure. Follow the instructions below to enable core isolation memory Integrity via Registry Editor:
[FIX] Core Isolation Memory Integrity Fails to EnableIntel’s Upcoming 24-Core Flagship Core i9-13900 Gets Tested in SiSoftware…PxHlpa64.sys Prevents the Enabling of Memory Integrity on Windows 11Fix: Memory Integrity Turned Off Due to Incompatible Drivers