After a big number of people have reported this issue, we have decided to take a deeper look into it to see what could be the causes. Here are all the possible triggers: Now that you know all the possible causes, here is a list of all the methods that people have used in order to fix this File Explorer issue:
1. Restart the File Explorer
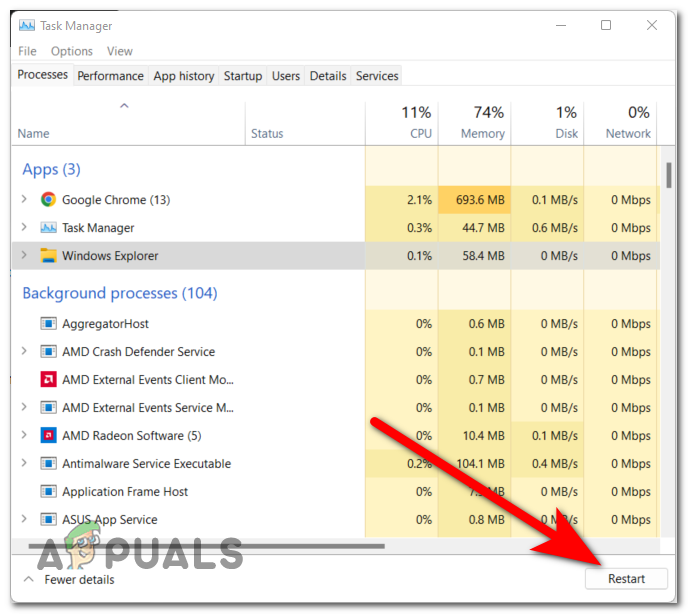
The first thing that users recommend you to do is to restart the File Explorer. This error could be a simple big that is happening to the File Explorer, so it is worth trying to fix it by completely closing it. All you have to do is to open the Task Manager and find the File Explorer task, then restart it. After that, your File Explorer search box should work properly. In case you don’t know how to do this, here are the steps you need to follow: In case you still encounter the File Explorer search box not returning any results issue, check the next method below.
2. Reboot your computer
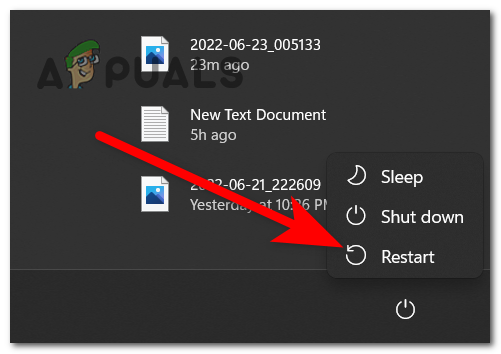
The second thing that users suggest you try is to restart your PC. This is another easy thing to do that has helped many people make their File Explorer search option work. This issue could be caused by the computer’s components which are not loaded properly, which is making your Windows act this way. So it is worth rebooting your computer to see if a fresh start will fix the problem. All you have to do is to reboot your personal computer. There are a few ways that you can do this, but the easiest one is to do it from the taskbar. Open the Start menu by clicking on the icon or pressing the Windows key, then click on the Power button and click on Restart. This will start the rebooting process. After the computer boots back and you get to the desktop, open the File Explorer and test the search box to see if the method had any results. If the File Explorer is still not working, go to the next method below.
3. Check your system for corrupted files
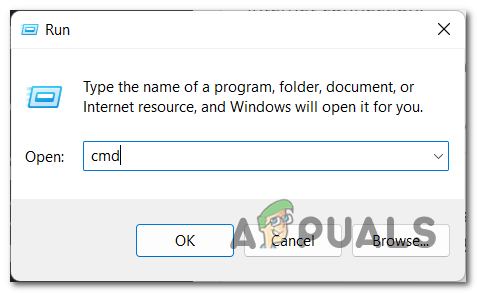
People also recommend you to check the corrupt system files to see if there are harmful files. Some files can become corrupted, leading to Windows problems like this one. This can happen anytime due to unknown reasons, but they are minor reasons that can be fixed very easily. You can fix this using the Command Prompt with administrator privileges to scan your PC for corrupted files. This can be simply done by pasting some commands that will do the job. This will be achieved by running SFC (System File Checker & DISM (Deployment Image Servicing and Management) scans in quick succession. When the process has finished, you should restart your computer to complete this method. Note: Before going straight to the steps of this method, you should make sure that you are connected to a stable internet connection. In case you don’t know how to check your system for corrupted files, here are the steps that you need to follow: If this method didn’t fix your issue as well, go to the next possible fix below.
4. Use the Search and Indexing Troubleshooter
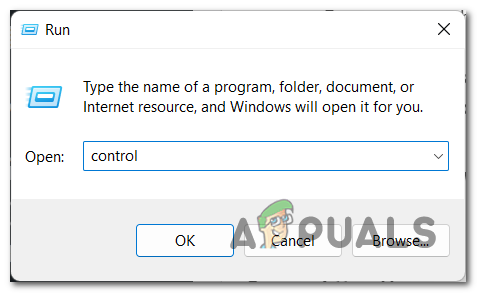
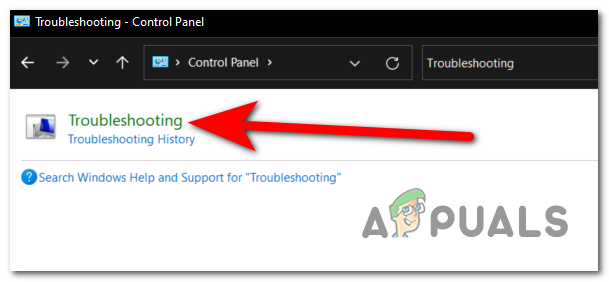
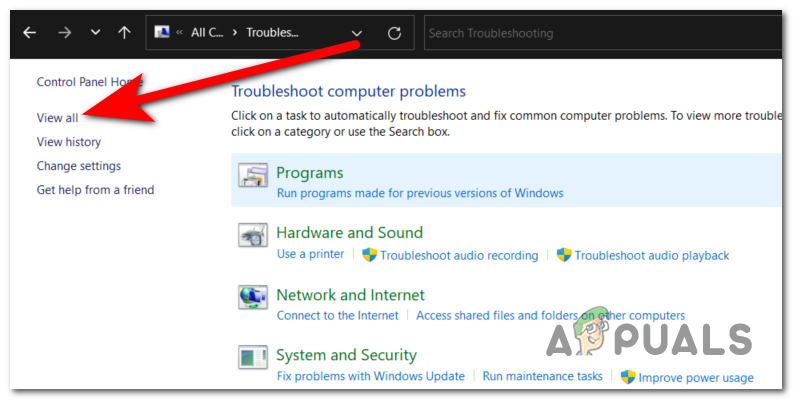
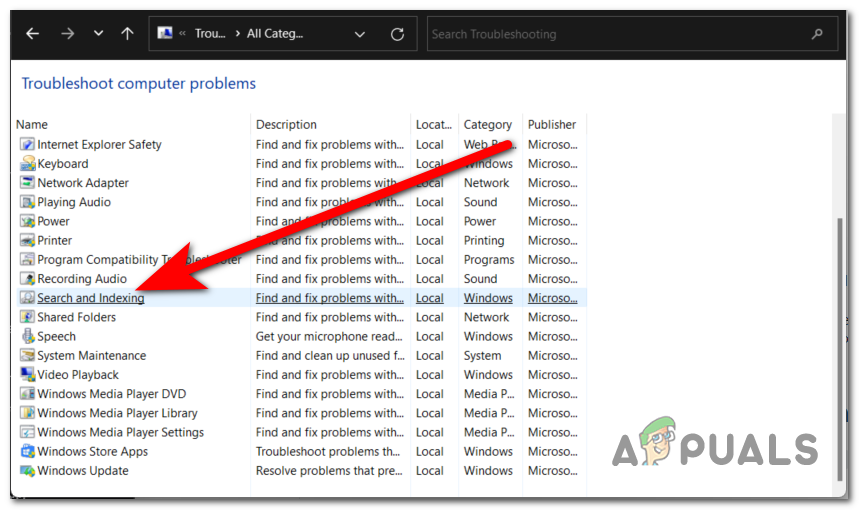
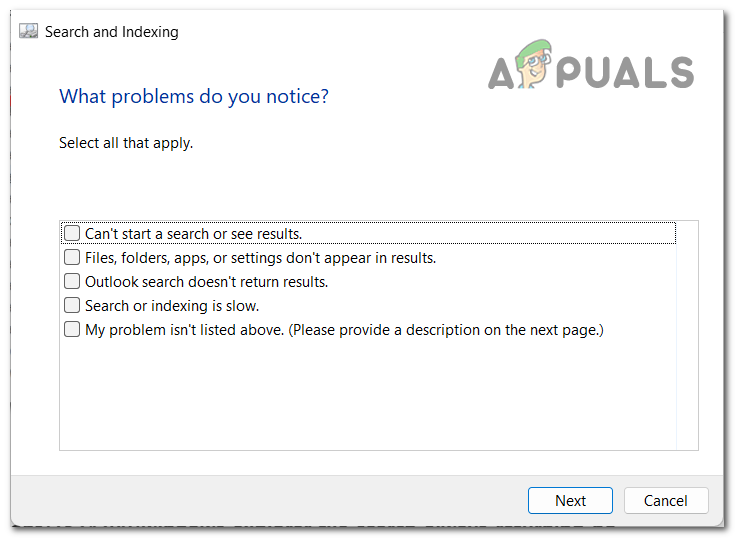
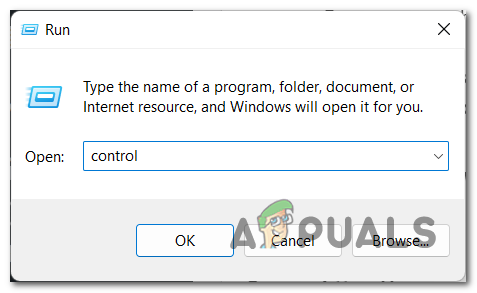
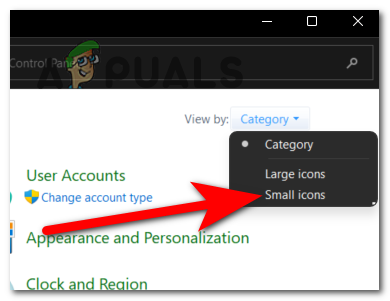
Another method that you should try is to use the Search and Indexing Troubleshooter to see if there are any problems that can be fixed. In case the troubleshoot fixes some problems indeed, this might actually make your File Explorer search box work properly again. This troubleshooter includes a series of automated repair strategies aimed at resolving various scenarios that will corrupt & break the indexing & search functionality on Windows. This repair tool is present on both Windows 10 and Windows 11. Note: The Search and Indexing Troubleshooter can be found inside the Control Panel. There you need to follow the instructions that appear on your screen. Here are the steps you need to follow in order to use the Search and Indexing Troubleshooter: If the problem is still occurring in your File Explorer, go to the next method.
5. Reboot your Windows virtual assistant Cortana
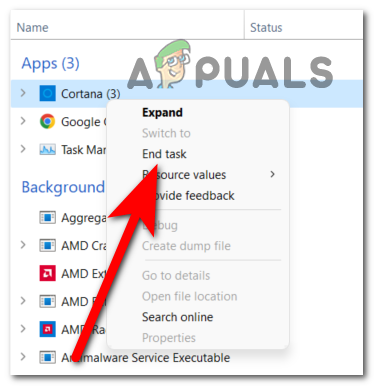
Some of the users that have gone through the File Explorer search box not returning any results issue have managed to fix this issue by rebooting the virtual assistant of Windows named Cortana. All you have to do is to restart the Windows virtual assistant named Cortana. You can do this from the Task Manager, so close the process of it and see if this had any effect on your issue. In case you don’t know how to use this, here are the steps you need to follow: In case this method didn’t fix this issue as well, go to the next one below.
6. Rebuild the Indexing services
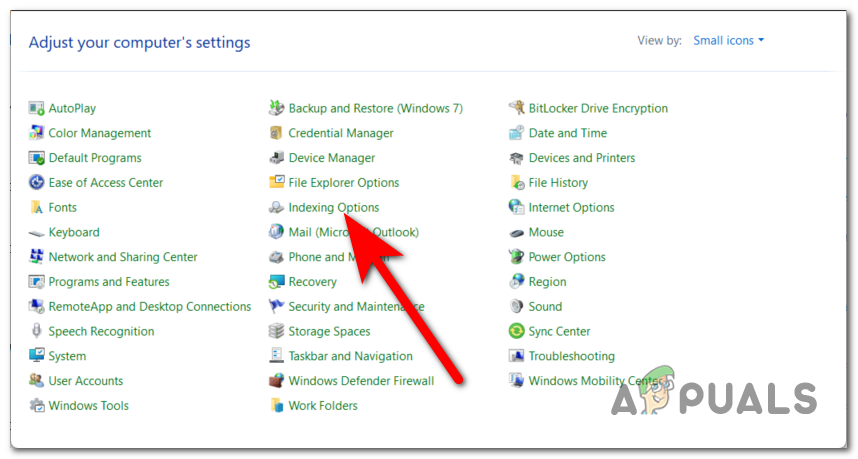
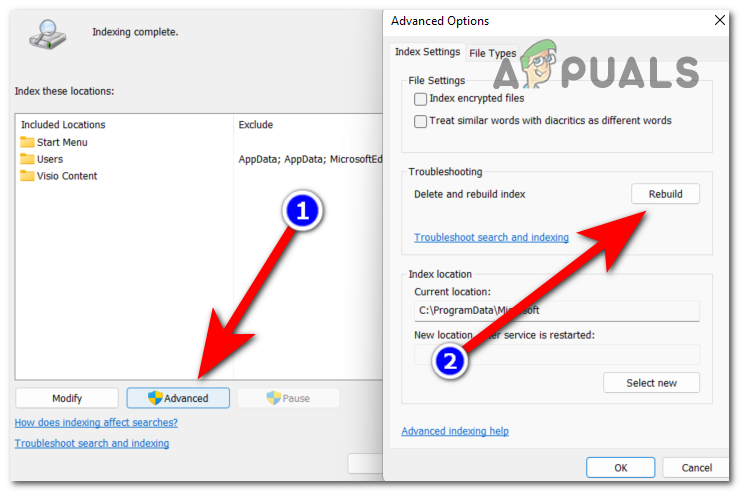
The affected users also suggest that you should try to rebuild the Indexing services in order to fix the File Explorer search box not returning any results issue. This method will rebuild the Indexing service, meaning that the problems that are happening to it will be repaired if this scenario is applicable. To do this, all you have to do is to go to the Control Panel and find the Indexing Options. From there, you will be able to rebuild and repair the Indexing services. Here is a guide that will show you exactly what you have to do: In case the same issue still appears on your screen, go to the next method below.
7. Restart the Windows Search Service
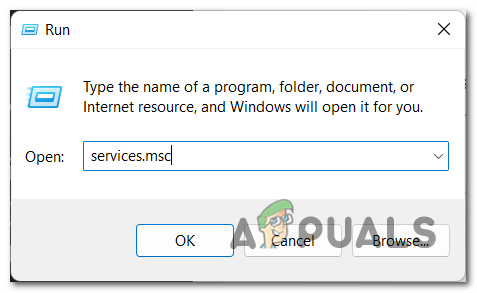
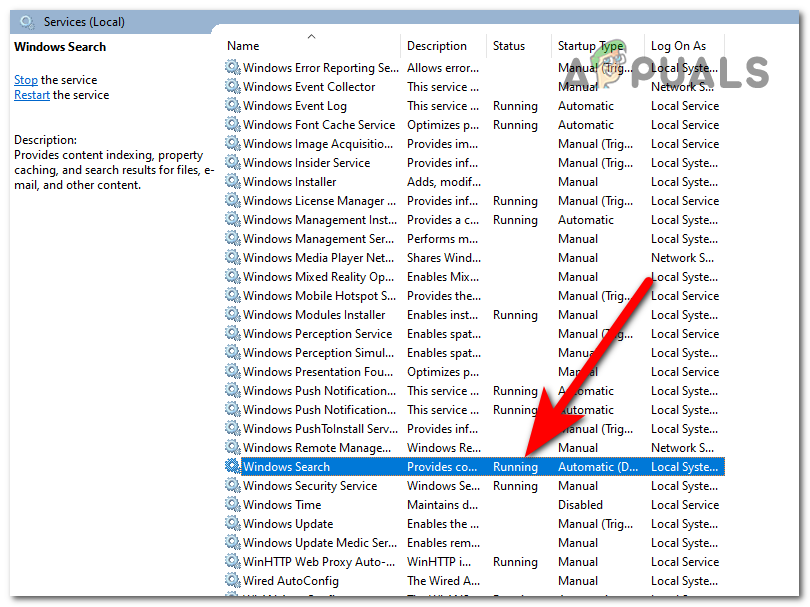
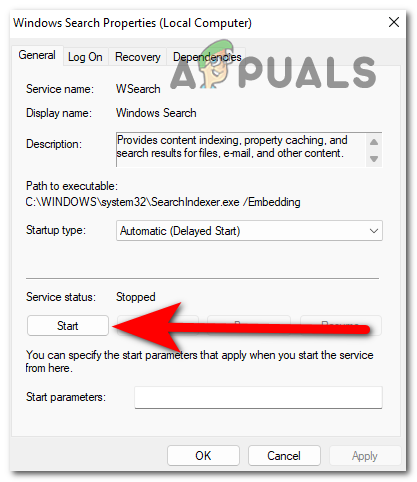
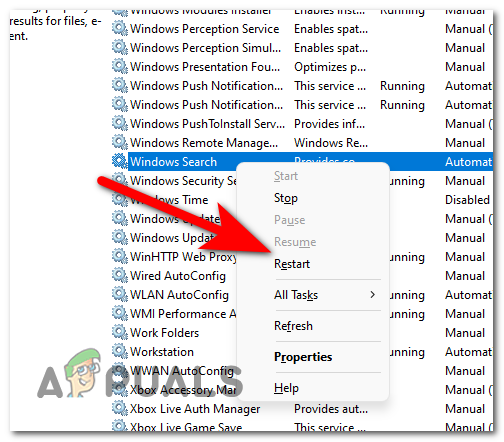
According to the people who went through this problem, another thing that is worth doing is to check if the Windows Search Service is enabled and running correctly. And if it is, you should restart it so make sure that is working as best as it can. Note: The Windows Search Service enables users to quickly search for files and items by file name, properties, and full-text contents, so it is very important to make sure that it is running properly. You can restart this service by going into the Services menu. There you will need to check if the Windows Search Service is running as it should. After that, you need to restart it to ensure if this is the cause or not. In case you don’t know how to do this, here are the steps you need to follow: If the File Explorer search box is still not returning any results, go check the next possible method.
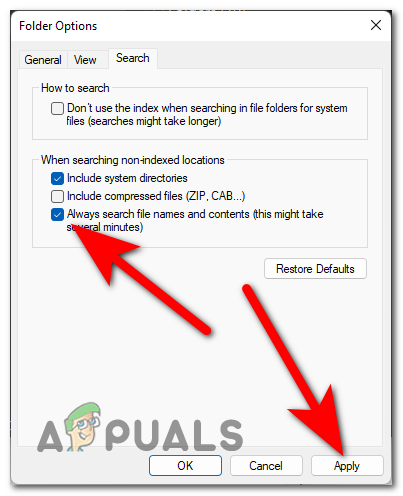
8. Enable the Always search file names and contents option
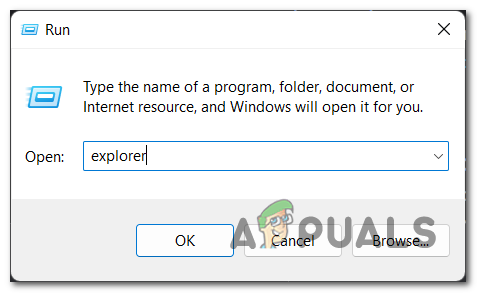
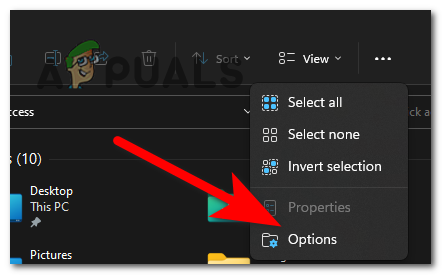
You should also try to enable the Always search file names and contents option. Installing this option will guarantee that while looking for non-indexed items, the File Explorer search function will look for the correct files and give the best results. All you have to do is to open the File Explorer and go to the Options of it. There you will be able to activate this option by checking the box next to it. Here is a step-by-step guide that will show you how to enable this option: In case neither of the methods before has fixed your File Explorer search box not returning any results problem, check below the last method available.
9. Install the latest Windows updates
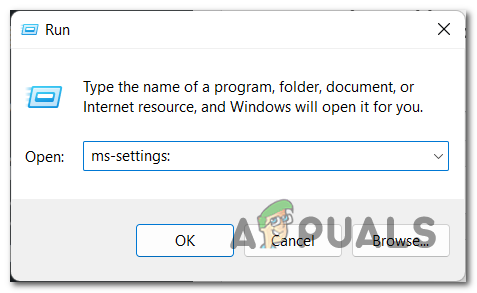
The last thing you need to do is to make sure that your Windows is having the latest updates installed. The File Explorer search box not working issue is only one of many issues that can be brought on by Windows being out of date. All you need to do is access Windows Update, check to see if any updates are available, then install them if they are. The Windows Update is located in your computer’s settings. In case you don’t know how to check if the latest Windows updates are installed, here are the steps:
[FIX] Mail app Search results Disappear on ClickFix: ‘No Results Found’ Error in Windows Search?How to Fix File Explorer Search Not Working in Windows 11?SOLVED: Search results aren’t quite ready yet, but we’re working on getting them…
