The problem can be easy to solve if you remain patient and don’t give up during the somewhat long process of troubleshooting. Don’t give up and hopefully, you will be able to get rid of this annoying error message during the boot.
Solution 1: Check for Connected Devices
If you have shut down your computer without taking out a CD or DVD from the reader or if you have left a USB device connected to your computer, a bug in the Windows operating system may cause it to try and boot from the device you have left, no matter what is actually located on it, hence the warning message. Check to see if there are any DVD or CD files in the reader and disconnect all external storage devices which don’t actually have the Windows 10 OS on them. Check to see if the Verifying DMI Pool Data Error is gone.
Solution 2: Clear the CMOS Battery
Clearing the CMOS battery will effectively cause two things: the BIOS settings which relate to the way your computer boots will be reset and you will start from the beginning when it comes to the boot, which is a thing which can solve this problem on its own. Furthermore, if there is some physical causes such as dust or dirt accumulating, you will solve that as well. Note: With some computers, you may need to disconnect cables, remove drives, or remove other parts of the PC to get full access to the CMOS battery.
Solution 3: Try to Fix Your Boot
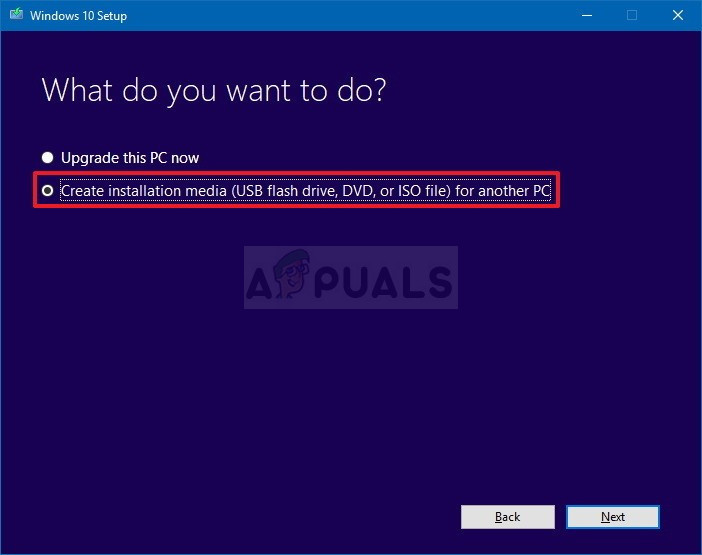
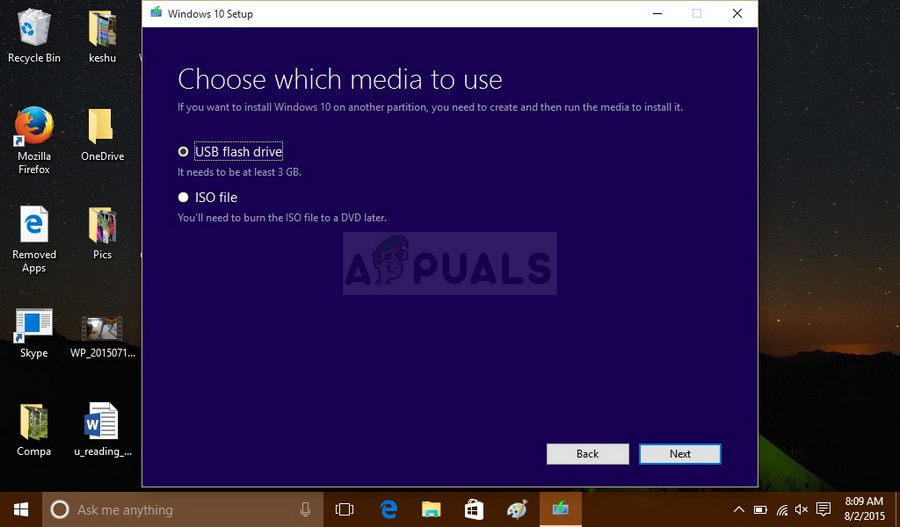
By using a recovery media which is a DVD or USB with the Windows system installed on it along with some helpful tools, you can solve the problem quite easily by using certain commands in Command Prompt. A greater issue would be to find such a DVD. With older versions of Windows, it has to be the DVD from which you have installed your system. Still, if you are able to boot to your computer normally, you can skip over to the very part where we open the Command Prompt, which you could do simply by searching for it, right-clicking on it in the Start menu, and choosing the Run as administrator option. However, with Windows 10 you can create your own recovery media and use it to fix your computer in no time.
Now that you probably have your recovery media, we can start actually solving the booting issue by opening the Command Prompt from within the recovery drive which you should boot from.
WINDOWS XP, VISTA, 7: Windows Setup should open prompting you to enter the preferred language and time and date settings. Enter them correctly and choose the Repair your computer option at the bottom of the window. Keep the initial radio button selected when prompted with Use recovery tools or Restore your computer and click on the Next option. Choose Startup Repair (the first option) when prompted with the Choose a recovery tool selection.WINDOWS 8, 8.1, 10: You will see a Choose your keyboard layout window so choose the one you want to use. The Choose an option screen will appear so navigate to Troubleshoot » Advanced Options » Command Prompt
BOOTREC.EXE /FIXBOOT
How to fix the Razer Synapse Stuck on Verifying Account?Fix: There are some data after the end of the payload dataFIX: Error Code 0x85050042 When Syncing Office 365 Account on Mobile DataFix: Twitch Error Loading Data


